

I love thrift stores. They carry so much inspiration! So, when I found this darling little denim mini skirt, I knew I had a sewing project in my very near future.
Then, as I was searching through the women's clothing section, I found a camo tank top.
BAM!!! My creative juices went haywire!
BAM!!! My creative juices went haywire!
Imagine my delight when I found two more camo shirts in the men's section, then a wad of half inch wide flat cream lace.
I was set!
I hope you enjoy this tutorial!
Here are my finds:


The first thing I did was pick the ruffle off the skirt. I would have cut it off, but I really liked the original frayed edge.

Then I found an old piece of material. You can see all the fading and the pleats from the previous garment. I didn't iron it, because it was going to be covered anyway. Lazy, maybe. Necessary, no.
I cut a piece on the fold 1 inch wider then the skirt to allow for seams.
Then cut the length. This will vary, depending on how long/short the skirt needs to be. For my daughter, age 7, I needed 11 inches, for the completed skirt to be 19-20 inches long.
The dark green piece was 11" x 35".

Set that piece to the side and get out the camo shirts or camo material if you have it.
Lay it flat. Cut as many 3 inch strips as possible. I had two of these shirts so I ended up with ten pieces.


Here are all ten laid out. I cut the seam off one side of the pieces. This will give you a long piece when unfolded.

Using the other shirt I had to get creative to get as many 3 inch strips as possible. I ended up only using two, but it was nice having a little extra.


Next I was ready to sew the strips together for the ruffles.
These ruffle pieces need to be twice as long as the length of the reserved piece for the skirt. In my case, the length of that piece was 35 inches, almost 1 yard. So because more ruffles couldn't hurt, I rounded it up to 36 inches, making the ruffle pieces 2 yards long each.
Start, sewing the ruffle pieces together at the short ends. Trim to the length you need them to be. Don't worry, you'll never notice the seams on the end product.
If you want to, now would be the time to hem one long side of the ruffles. I didn't because I figured the raw edges would only add to the charm of the skirt. Not to mention, it saved me a gob of sewing!

I ended up with 6 ruffle pieces, all 2 yards long and 3" wide.
Then on three pieces I added two rows of the flat lace. To get the ruffle effect, stretch the camo material and allow the lace to feed in as needed.

Then on the large skirt piece, mark lines 1 3/4 inches apart. These will be where you sew the ruffles.

Arrange the pieces as you want them to appear on the skirt.
If you have a ruffler, lucky you. I don't. But with a little extra effort, I got it done.
Here's what you need to do if you don't have a ruffler:
1. Set your stitch length to widest possible setting. Sew along the top long edge of your ruffle pieces. Do not back stitch on either end.

2. Find the center of the ruffle. Pin it to the center of the bottom line on the large skirt piece.
3. Pin the ends to of the ruffle piece to the end s of the skirt piece.
4. Divide the material between the pins as evenly as possible on each side of the center. You'll have five pins holding the ruffle to the skirt.

5. Now you are ready to ruffle! Pull the bottom thread of the wide stitching.

Work from both ends until the ruffle is the same length as the skirt. Add a few pins to secure it.

6. Then sew it on. NOTE: Leave 1 inch on either end, unsewed, but pinned. You'll understand later when you go to sew the skirt ends together. Sorry for the bad picture. I was sitting at a very sunny window.

Repeat those six steps until all your ruffles are on and the skirt is covered.

Remember those one inch ends you didn't sew? Fold the ruffle pieces back and pin down. Do that on both ends.
Now fold the skirt in half, right sides facing each other. Sew the ends together, being sure to not catch any ruffle in between. You should only be sewing on two layers of material.

Turn it right side out. It should look like this:

Now unpin the bottom ruffle first. If you want to hem, go for it. Again, I figured the it would add to the charm of the skirt. It's hardly noticeable since there are so many ruffles.

Lay the other piece over the first.

Sew in place. Repeat for all layers of ruffles.

Finished product looks like this. If you squint you might be able to find the ends of the ruffle.

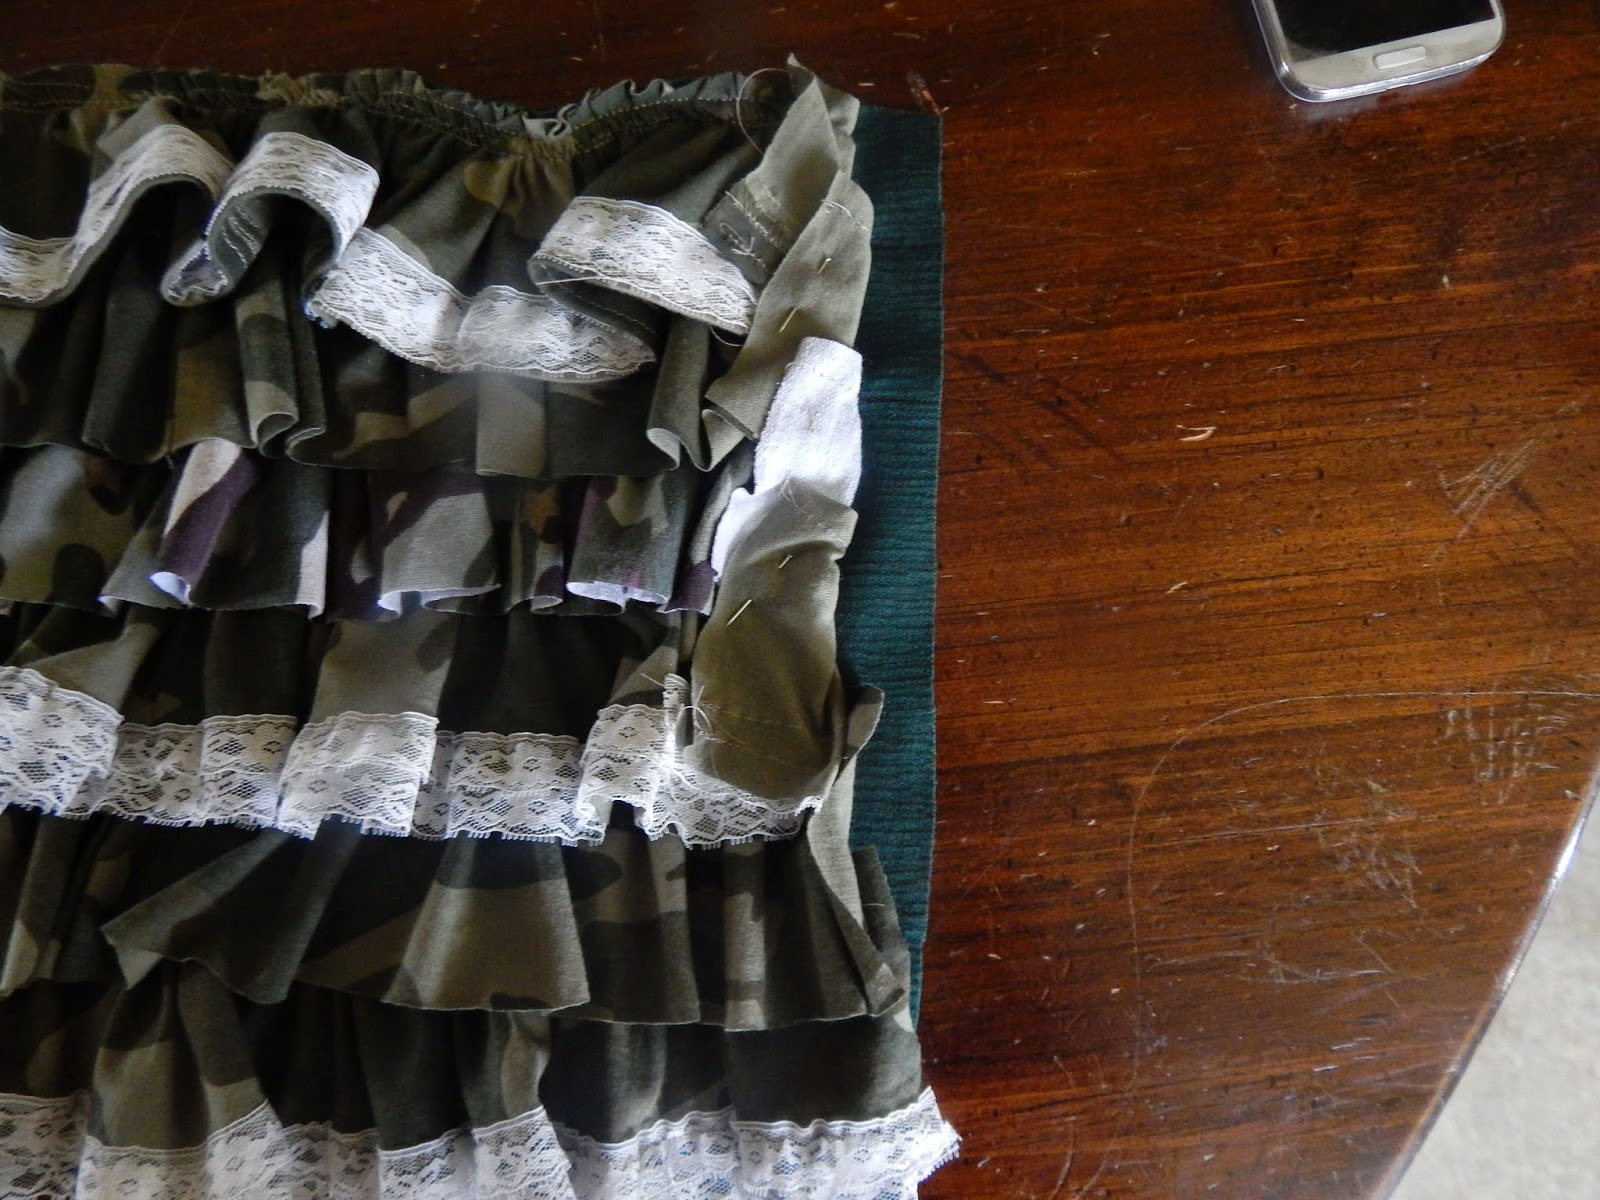
When laid flat, the ruffle skirt should be the same width as the denim skirt part.

Because I wanted the original fraying of the skirt, I simply pushed the ruffle part inside the denim part, overlapping about 3/4 inch. Pinned it together and sewed it on. I sewed this seam twice just to make it stronger.

I was going to sew the original skirt ruffle to the bottom of the ruffles, but it looks great without!
Here is the finished product!
(and my beautiful daughter!)


"She is clothed with strength and dignity"
~Proverbs 31: 25~


WOW!!! This is an awesome tutorial. The skirt turned out so cute. I love camo with the denim!
ReplyDeleteHi, saw your link at Creative Spark...cute skirt and very creative! I love going to thrift stores, too, and using the clothes to re-create something new and fresh. This was a great tutorial!
ReplyDeleteThis is so cute!
ReplyDelete